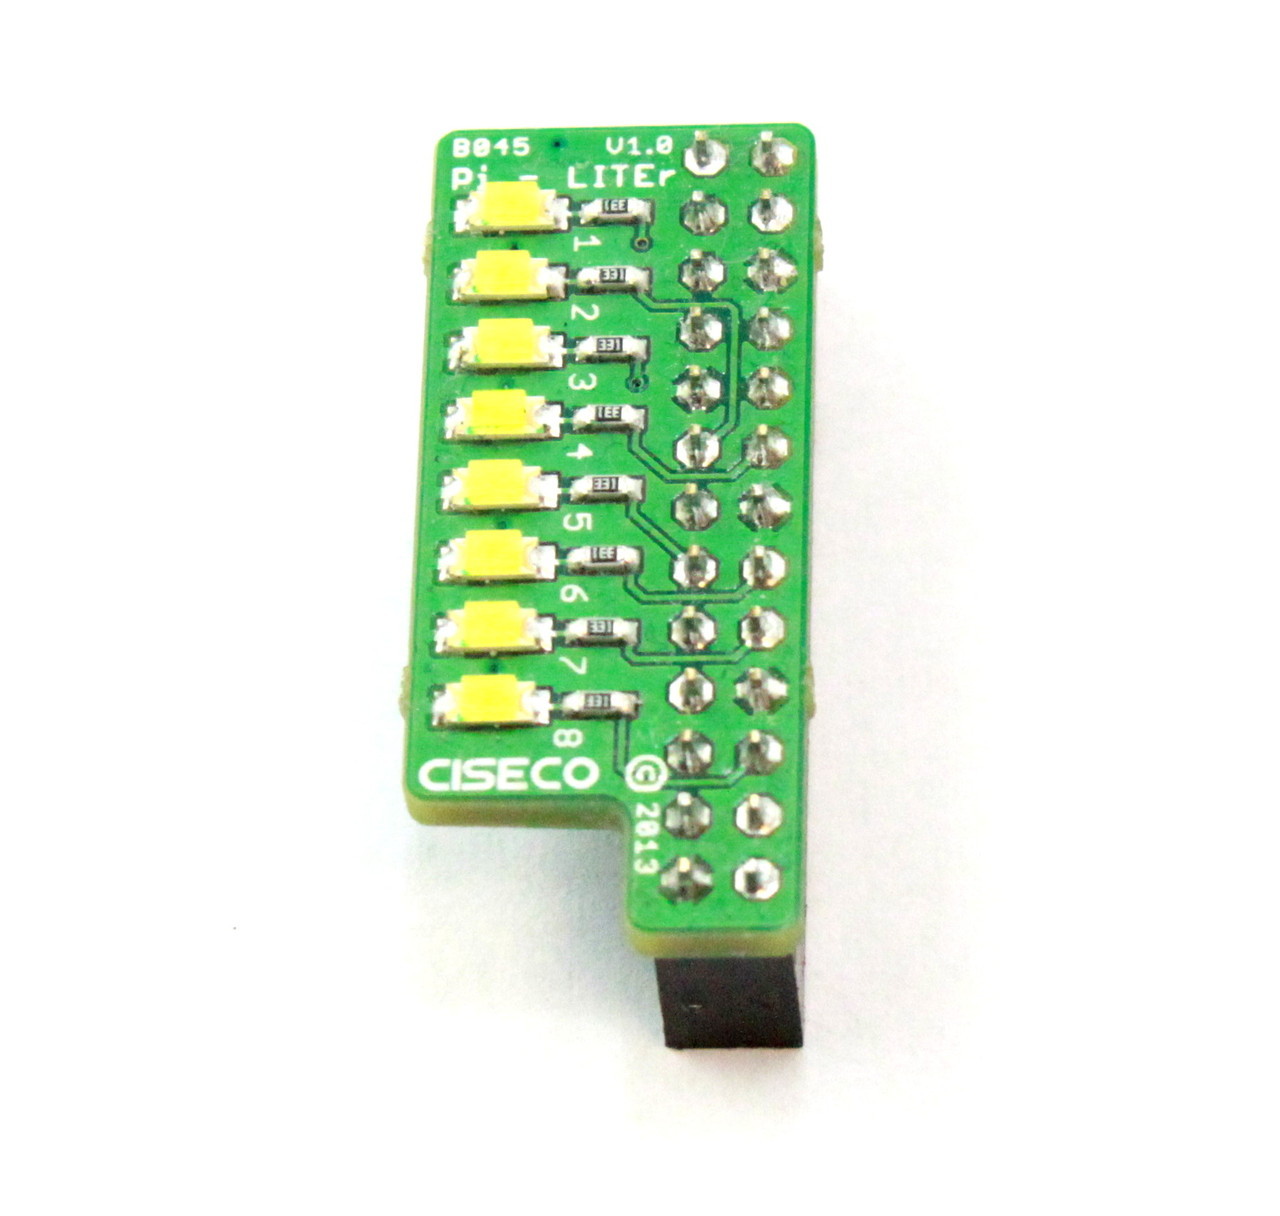
Pi-LITEr för Raspberry Pi
Pi-LITEr
|
Innehåll.
Inledning. |
|
|
Inledning. |
|
|
|
Pi-LITEr och C.
// pi-liter-test.c
//
// Example program for bcm2835 library
// Blinks a pin on an off every 0.5 secs
//
// After installing bcm2835, you can build this
// with something like:
// gcc -o pi-liter-test -l rt pi-liter-test.c -l bcm2835
// sudo ./pi-liter-test
//
// Or you can test it before installing with:
// gcc -o pi-liter-test -l rt -I ../../src ../../src/bcm2835.c pi-liter-test.c
// sudo ./pi-liter-test
//
// Author: Mike McCauley (mikem@open.com.au)
// Copyright (C) 2011 Mike McCauley
// $Id: RF22.h,v 1.21 2012/05/30 01:51:25 mikem Exp $
// Modified: Jan Pihlgren 2014-04-11

#include "bcm2835.h"

// Blinks on RPi pin GPIO 11
#define PIN1 RPI_GPIO_P1_07
#define PIN2 RPI_GPIO_P1_11
//#define PIN3 RPI_GPIO_P1_13
#define PIN3 RPI_V2_GPIO_P1_13
#define PIN4 RPI_GPIO_P1_12
#define PIN5 RPI_GPIO_P1_15
#define PIN6 RPI_GPIO_P1_16
#define PIN7 RPI_GPIO_P1_18
#define PIN8 RPI_GPIO_P1_22

int main(int argc, char **argv)
{
    // If you call this, it will not actually access the GPIO
    // Use for testing
//    bcm2835_set_debug(1);

    if (!bcm2835_init())
        return 1;

    // Set the pin to be an output
    bcm2835_gpio_fsel(PIN1, BCM2835_GPIO_FSEL_OUTP);
    bcm2835_gpio_fsel(PIN2, BCM2835_GPIO_FSEL_OUTP);
    bcm2835_gpio_fsel(PIN3, BCM2835_GPIO_FSEL_OUTP);
    bcm2835_gpio_fsel(PIN4, BCM2835_GPIO_FSEL_OUTP);
    bcm2835_gpio_fsel(PIN5, BCM2835_GPIO_FSEL_OUTP);
    bcm2835_gpio_fsel(PIN6, BCM2835_GPIO_FSEL_OUTP);
    bcm2835_gpio_fsel(PIN7, BCM2835_GPIO_FSEL_OUTP);
    bcm2835_gpio_fsel(PIN8, BCM2835_GPIO_FSEL_OUTP);
    // Blink
    while (1)
    {
        // Turn it on
        bcm2835_gpio_write(PIN1, HIGH);
        // wait a bit
        delay(500);
        // turn it off
        bcm2835_gpio_write(PIN1, LOW);
        bcm2835_gpio_write(PIN2, HIGH);
        // wait a bit
        delay(500);
        bcm2835_gpio_write(PIN2, LOW);
        bcm2835_gpio_write(PIN3, HIGH);
        // wait a bit
        delay(500);
        bcm2835_gpio_write(PIN3, LOW);
        bcm2835_gpio_write(PIN4, HIGH);
        // wait a bit
        delay(500);
        bcm2835_gpio_write(PIN4, LOW);
        bcm2835_gpio_write(PIN5, HIGH);
        // wait a bit
        delay(500);
        bcm2835_gpio_write(PIN5, LOW);
        bcm2835_gpio_write(PIN6, HIGH);
        // wait a bit
        delay(500);
        bcm2835_gpio_write(PIN6, LOW);
        bcm2835_gpio_write(PIN7, HIGH);
        // wait a bit
        delay(500);
        bcm2835_gpio_write(PIN7, LOW);
        bcm2835_gpio_write(PIN8, HIGH);
        // wait a bit
        delay(500);
        bcm2835_gpio_write(PIN8, LOW);
        // wait a bit
        delay(500);
    }

    return 0;
}
|
|
Inledning. |